In Web hosting, a panel is very crucial in all operations that will take your website online, have your emails working, SSL certificate installation, just to mention a few of the main operations in hosting a website. The common panels include, Cpanel, Cyberpanel, Centos web panel (CWP), Plesk, hpanel, Direct Admin, Webmin, ISPmanager just to mention a few. In this guide, we cover Cyberpanel installation and other operations involved in setting up a website and emails.
Cyberpanel is a web hosting panel, whose web server is Litespeed. The panel is commonly installed on virtual private servers. By default, VPS servers are purchased without a panel. You have a chance to choose between the free available panels or premium panels. With good command-line skills, you may not need a panel as all tasks done on the panel can be done on ssh.
How to install CyberPanel
Requirements:
- You need access to a VPS, with root access to be able to run the various commands.
- Vps needs to have any of the following OS; Centos 7.x, Centos 8.x, Ubuntu 18.04, Ubuntu 20.04
- At least 1024 MB of RAM
- At least 10 GB of disk space.
Procedure.
- Access the VPS via ssh. You need to have the root privileges. Run the following command:
ssh root@you-vps-ip
Then enter your password when prompted - Update your VPS packages.
Different commands are used depending on the operating system that is installed.
For CentOSsudo yum check-update
sudo yum update
For Ubuntusudo apt update && sudo apt upgrade -y - Initialize the installation script by running
sh <(curl https://cyberpanel.net/install.sh || wget -O - https://cyberpanel.net/install.sh)
This follows a series of questions, most of which you have an option of selecting the default value. - Select the version of Cyberpanel to install
CyberPanel Installer v2.1.2
RAM check : 415/966MB (42.96%)
Disk check : 7/19GB (43%). (Minimal 10GB free space)
1. Install CyberPanel with OpenLiteSpeed.
2. Install Cyberpanel with LiteSpeed Enterprise.
3. Exit. Please enter the number[1-3]:
If you have purchased a license, select option 2, otherwise, select option 1 for the free version. - Select add-on options. On the following prompts, it’s recommended that you use the default options, and change the options where necessary. The default option is indicated. You can read more about some of these add-ons by hovering on their name to open the link to their official documentation.
Full Service (default Y):
>> PowerDNS – DNS server
>> Postfix – mail transfer agent
>> Pure-FTPd – FTP server
Remote MySQL (default N): This allows your database to be installed on a remote server
CyberPanel Version (default Latest Version): You can choose to install a previous version of CyberPanel, or press Enter to install the latest. We recommend the latest.
Password (default “1234567”): It is recommended that you use “s” to set your own strong password
Memcached (default Y): memory object caching system
Redis (default Y): In-memory data structure store, used as a database, cache, and message broke
Watchdog (default Yes): Kernel watchdog is used to monitor if a system is running. It is supposed to automatically reboot hanged systems due to unrecoverable software errors - Once the add-ons are selected, the installation of the required dependencies takes place. Complete installation may take up to 15 minutes. Restart the service on prompt.
- Once the installation is complete, you will receive various links to access the different services of the newly set up Cyberpanel. Take note of the different URLs and copy them to your notebook for reference. Take note of the URL to access your Cyberpanel dashboard, as this is the URL to be used most of the time.
Cyberpanel dashboard login: https://<your server's IP address>:8090. The default username is admin and the password set during installation.
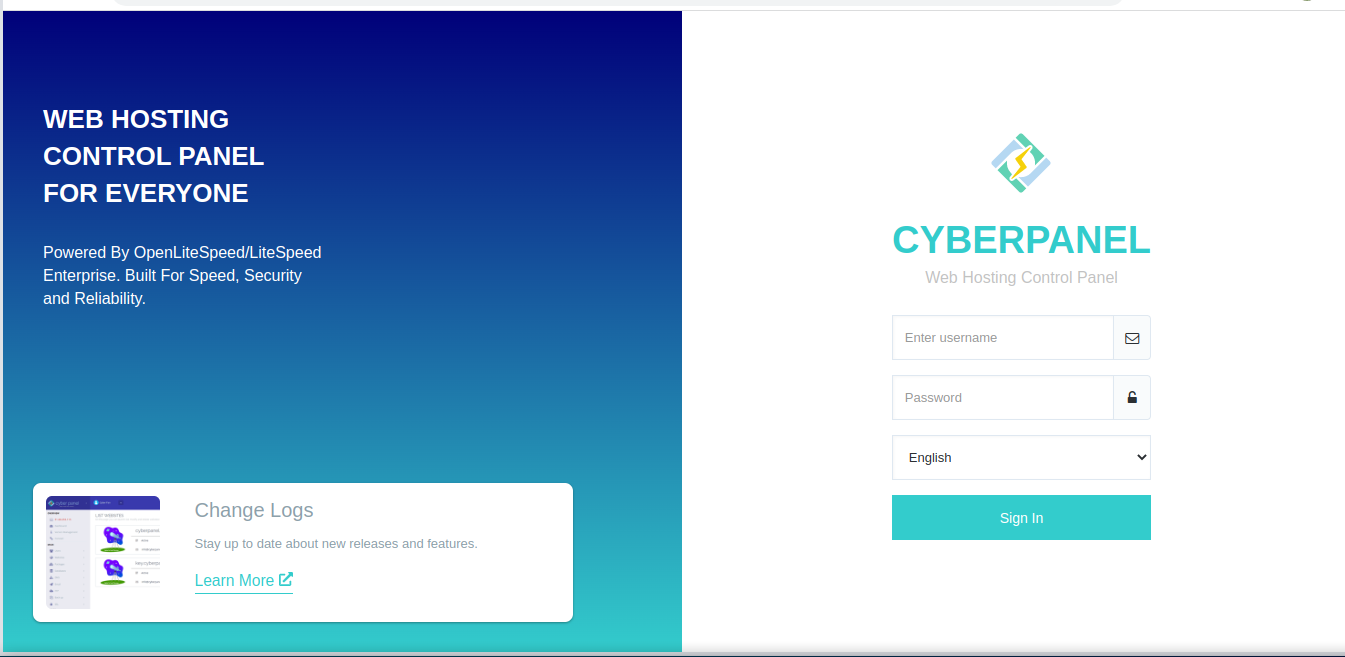
How To Access CyberPanel Dashboard
After successful installation, it’s time to access the admin dashboard. Open your preferred browser, and type in:https://your-vps-ip:8090
You will be required to key in your username and password. The default username is admin and the password set earlier during installation.

How to Add a Domain on CyberPanel
On accessing the dashboard as illustrated in the previous step, we can now set up our domain name, ready to upload our website.
Click on Websites >> Create website >> | This will open the form on which you are required to fill in your website information. You can access this interface directly by typing:: https://your-vps-ip:8090/websites/createWebsite

Select package: Click on the drop-down and select the default package. If you had defined custom packages, they appear in this section. select the desired one.
Select owner: Select admin
Domain name: Enter a registered domain name. Ensure the DNS of the domain is set to point to the current VPS
Email: Enter the administrative email for your account.
Select PHP: Select the PHP version as desired. Some types of websites are sensitive to the version selected. This can be changed anytime as required. At the time of recording this guide, PHP version 7.4 is recommended.
Additional Features: Select all the additional features as required and click Create Website.
This will create an account for your domain name, and create the required folders.
How to install WordPress in Cyberpanel
WordPress being the leading CMS, there is a need to have the skills on how to set it up in Cyberpanel. Having added your domain to your Cyberpanel, navigate to the homepage of your dashboard, found under:https://your-vps-ip:8090/base/
Click on Websites >> List Website >> Manage >> Under APPLICATION INSTALLER click on Wp + LSCache
A quick link to this dashboard:https://your-vps-ip:8090/websites/domain-name

Fill in your WordPress website details. If you have multiple domains, ensure to select the intended domain.

For Login users; set your admin username, and Login Password set a strong password. Fill in all the details and click on the Install Now button. Once the installation is complete, proceed to access your admin dashboard to customize your website: https://domain-name/wp-admin
How to Install Free SSL on a Domain in CyberPanel
An SSL certificate is another important ingredient when deploying your website online. With an ssl installed, you can be sure that your website visitors will feel safe when browsing thru your website. An SSL certificate offers a layer of security to your users. For Cpanel free ssl, see the guide here: https://wordspiner.xyz/how-to-install-free-ssl-certificate-on-your-domain-name-or-subdomain-on-cpanel/
How to identify a website with an SSL certificate
It is very easy to identify a website with an SSL certificate. Check at the browser address and you will identify a padlock icon embedded. This shows that your website has an ssl installed. You can also check on the ssl details by clicking on the padlock > connection is secure>> Certificate is valid and view the certificate details.


Cyberpanel has a provision of free ssl. Below is the procedure on how to set it up.
From your Cyberpanel admin dashboard: https://your-vps-ip:8090/base/ click on Websites >> List Website
On the list of your website page, check thru for the Issue SSL button next to the domain name you wish to install the ssl, click on this button and allow some time for ssl installation.

After the ssl has been installed, we need to force the domain to redirect to HTTPS protocol, every time it is accessed using the HTTP protocol.
How to redirect your domain to HTTPS on Cyberpanel
From your admin Cyberpanel dashboard; click on Websites >> List website >> Manage (the domain you wish to redirect)>> File Manager >> Public_html >> Quick link to get here:https://your-vps-IP:8090/filemanager/domain-name
While in the public_html, locate a file named .htaccess, and if not present, create one using the New File button. Copy the following code in this file:
RewriteEngine On

RewriteCond %{HTTPS} off

RewriteRule ^(.*)$ https://%{HTTP_HOST}%{REQUEST_URI} [L,R=301]
This will ensure your domain is only accessible using the HTTPS protocol.
How to Create an email account on CyberPanel
On your cyberpanel admin dashboard, ie: https://your-vps-ip:8090/base/ click on the Emails Icon.
The page that opens, has some different email functions.

Click on Create Email >> Select the domain you wish to create emails on >> fill in your email details and click create Email. The Quick link to access this dashboard:https://your-vps-ip:8090/email/createEmailAccount
To access the emails created, click on the Access webmail button from the previous Mails function image or https://Your-vps-ip:8090/snappymail/index.php
In case you forget your email password, use the Change Password function
How To change the Php version of a domain on Cyberpanel
After deploying your website, you may encounter some errors- one of the causes of error 500, is related to using an incompatible PHP version
To change the PHP version of a domain on Cyberpanel; access your admin dashboard on https://Your-vps-ip:8090/base/
Click on Websites >> List Website >> Manage (next to the domain you wish to change the PHP version)>> Scroll to the Configuration Section >> Click on Change PHP button >> Select the version of choice and click on Change PHP button to change.

How to Create MySQL Database in CyberPanel
In your Cyberpanel admin dashboard on https://Your-vps-ip:8090/base/

Click on Databases >> Create Database >> Select your domain in the select website dropdown >> Fill in the database name, username, and password and click on Create Database. Remember to note down the details as they may be needed when setting up your website.
FAQS
How to set a Hostname
>> Access the server on ssh and run the command:hostnamectl set-hostname newhostname
>> To check the hostname, run the command:hostname
How to change or reset Cyberpanel admin Password
Access the server via ssh and run the command:adminPass new-pass
where new-pass is the new password you want to set
How to upload a file on ssh
Ensure to compress the files to be uploaded. Open the terminal or the ssh client of choice and run the commandscp /path-to-file/zip-file-name root@your-vps-ip:/home/your-domain.
Enter password on prompt:
This will upload the file on the same level as the public_html of the given domain. You can then move it to the public_html
Should you face any challenges, reach out to us, by posting a comment, or contacting us for assistance.
Web Hosting and email hosting Packages
Related content
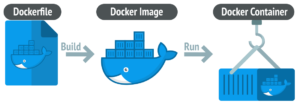
- A Practical Tutorial for Dockerizing Software Applications
- How to Configure a Docker App to a Domain Name
- Getting Started with Docker | Docker commands
- How To Run Scripts in Linux
- Deploy a Django Application on EC2 Instance with Nginx
- How to configure a domain to a docker container and install an SSL certificate on AWS