WordPress is an open-source CMS (content management system) and is free. The base language used to develop WordPress is PHP. Among other CMS, WordPress has gained popularity over the years. Other CMS includes Joomla, Drupal, Wix, Shopify, and Magento among others. This article covers how to install WordPress on Cpanel.
There are 2 main methods how to install WordPress on Cpanel.
Requirements:
To follow along with this guide, you will require a domain name or a subdomain and a Cpanel/hosting.
Method 1:How to Install WordPress from WordPress Softaculous dashboard
- Access your Cpanel home page.
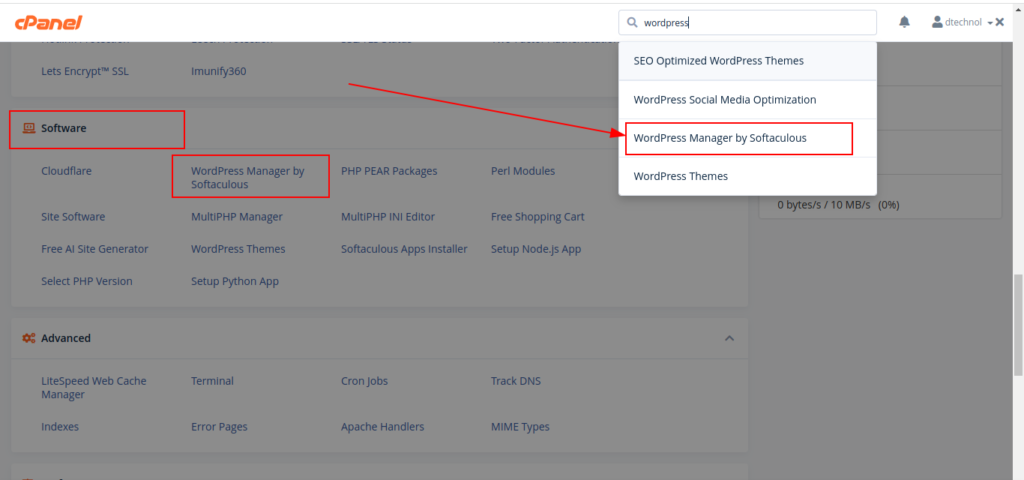
- Search for WordPress Manager by Softaculous from the Cpanel search field
OR
Scroll down under the software group and select WordPress Manager by Softaculous. See the screenshot below.

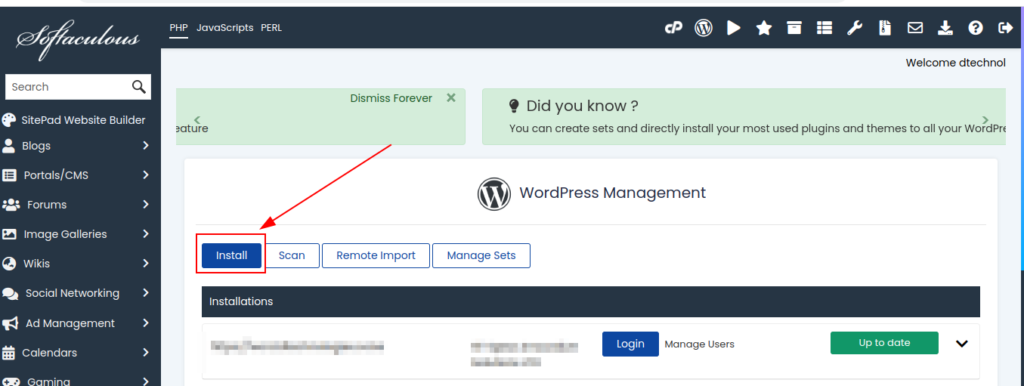
3. This opens up the WordPress Softaculous dashboard.
4. Click on the Install button to access the installation dashboard.
5. On the installation Software Setup dashboard, there are a few fields to take note of: Fill in the details correctly.
Choose Installation URL
Choose Protocol: This refers to the format in which your domain will be accessible through the browser. This takes the form of http://, https://, http://www. or even https://www. All of them are correct, but for purposes of ranking higher on Google as will be covered in a separate guide, we select a protocol that has ssl. In this tutorial, it is recommended you select https://
Choose Domain: If you have multiple domains and subdomains, click on this section to launch a drop-down, that will give you an option of selecting the domain/subdomain on which you wish to install WordPress.
In Directory: Leave this field blank so that WordPress is installed on the root folder of your domain or subdomain. In case you wish to install it on a folder, specify the folder here.
Choose the version you want to install
Version: It is advisable to select the latest version which is selected by default
Site Settings
Under this category set the Site Name: Give your website a name, such as your business name
Site Description: Give a brief description of your site. This description appears on Google on indexing or when sharing your website link via social media. This may however not always appear on some platforms.
Admin Account
Under this category, set up the following:
Admin Username: Enter your preferred username; the default one is admin.
Admin Password: Enter your preferred password; by default set as pass. Ensure that the password you set is strong.
Admin Email: Enter your admin password. This could be used to reset your password.
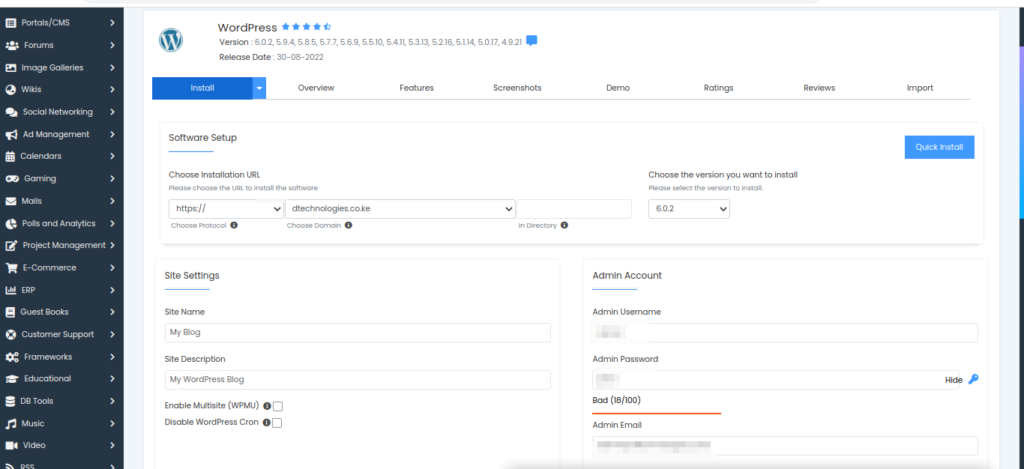
After filling in the recommended fields, leave other fields as default. Scroll to the bottom and click on Install.
This takes a minute or 2 to complete WordPress installation. After installation, you can access your domain on a browser. To access your WordPress dashboard, you can access it by accessing https://yourdomain/wp-admin – use the username and password set up in step 5. Access the dashboard to continue customizing your website.
Method 2: How to install WordPress from scratch
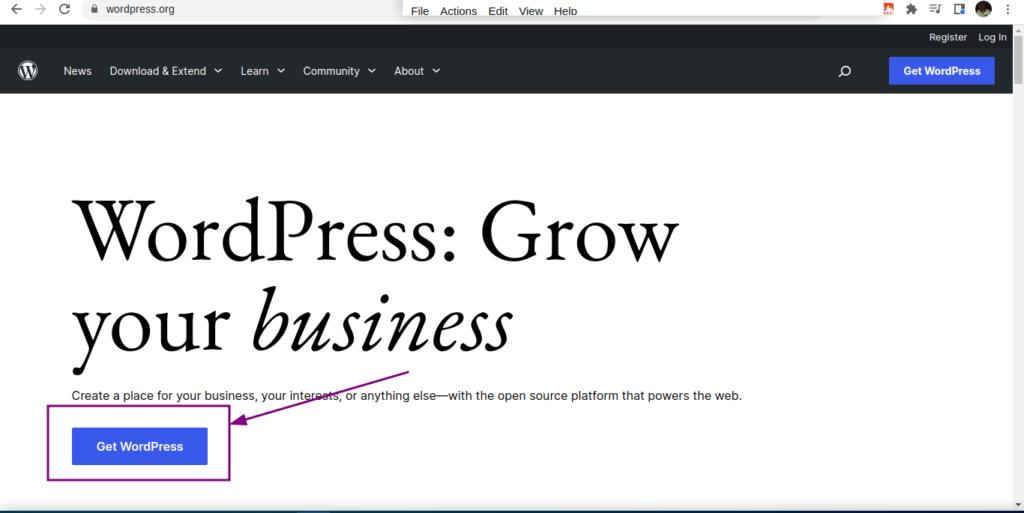
- Visit https://wordpress.org/ and click on the Get WordPress button
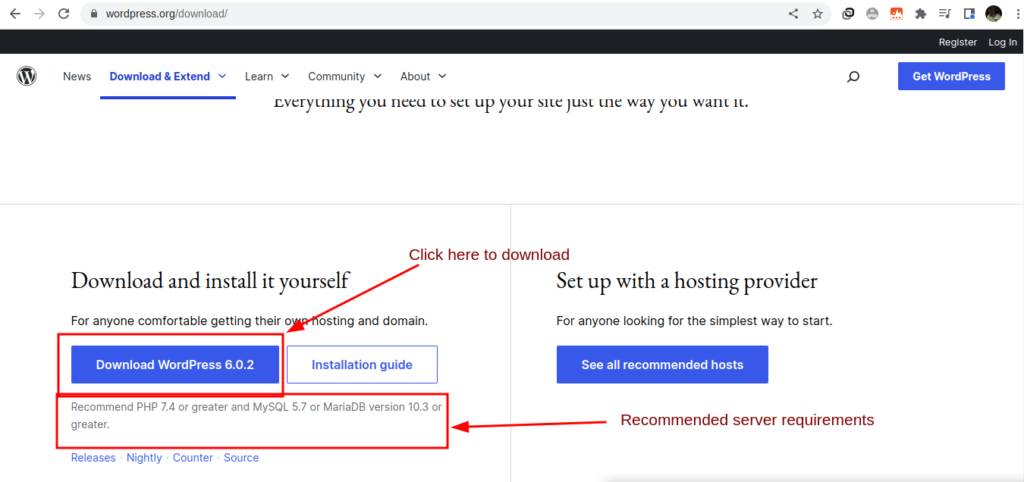
3. The purpose of visiting this page is to download the WordPress installation files. Scroll to Download and Install it yourself section and click on the Download WordPress button. Take note of the server requirements and adjust your server accordingly.
4. After the WordPress files are downloaded, log in to your Cpanel and access the document root folder of your domain/subdomain so as to upload the WordPress files. The easiest way to locate your document root on your Cpanel:
How to Quickly access the document root folder
- On your Cpanel, scroll to the domains section, and click on the domains option

2. On the List Domains page, click on the name adjacent to the domain name/subdomain under the Document root column. This opens the file manager on the document root folder for the domain/subdomain that we wish to install WordPress on.

5. On the root folder of your domain/subdomain name, Click on the Upload button
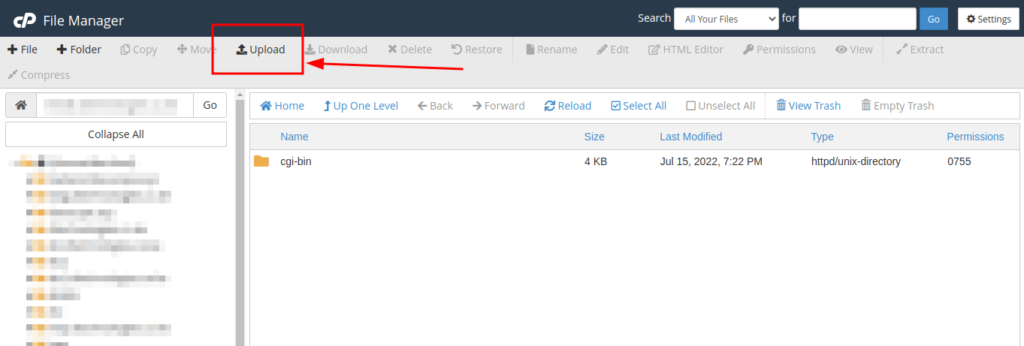
6. Click on the Select File button or use the drag-and drop functionality to upload the file downloaded in step 3.

7. After the upload is complete, click on the compressed WordPress files, and extract.
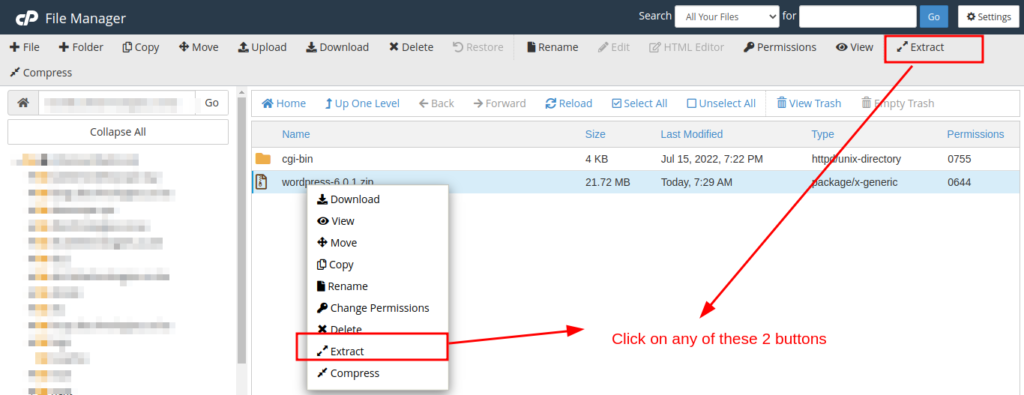
8. By default, these files will be extracted on a folder named WordPress. Access this folder, Select all the files, and move them to one folder up.
How To Create Mysql Database and a Database User
On your Cpanel search fields, search for MYSQL Database Wizard and access the page.

Enter your preferred database name, proceed and set a database user name, and set the user password. Ensure to note down the information used as it will be required in the WordPress set up. After the user is created, Give the user database privileges by clicking on the check box “ALL PRIVILEGES” and selecting “Make changes” button. This creates the user and assigns them the necessary database permissions.
10. With all this done, access your domain/subdomain on your browser and initiate WordPress installation. Since it is a new installation, the installation wizard will take us through some installation steps.
- Language Selection: Select your preferred language and click on Continue.
- Database information: This section has been done on step 9. Click on the “Let’s go” button.
- Fill in the database information that you noted down in step 9. For the database host use the default ‘localhost’. Also, do not change the table prefix unless sure of your actions.
- If the information is correct, Confirm “Run the installation”. If not, check if you made a mistake in the database information.

- Just like in method 1, we need to set up our site information. Fill in the following information correctly. Site Title, Username, Password, your email and confirm the installation. Ensure to note down the username and the password as this will be required to access the admin dashboard.
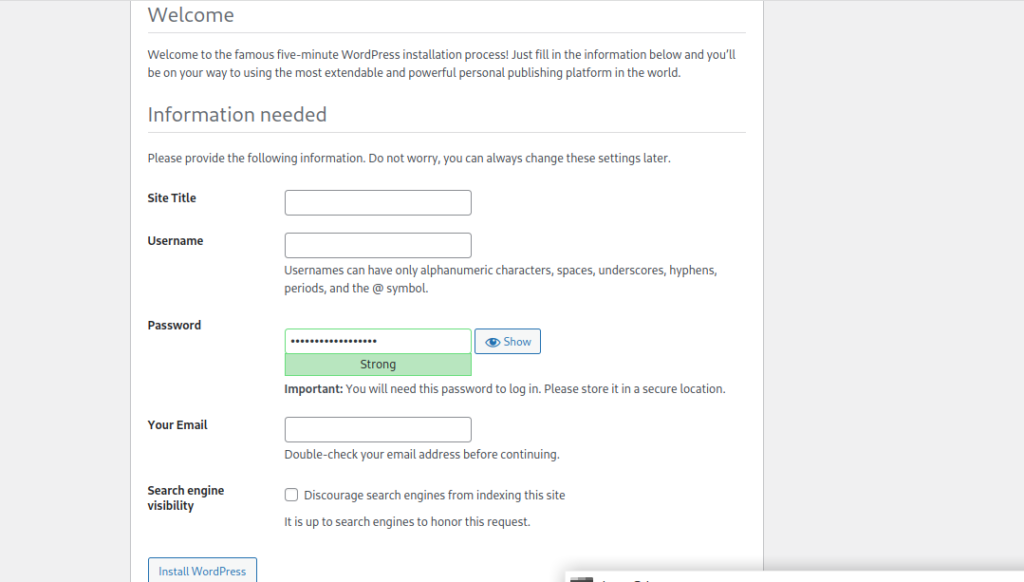
This is the last step of WordPress installation. To access your WordPress dashboard, enter the url www.yourdomainname/wp-admin or www.yourdomainname/wp-login.php to access your admin dashboard and customize your web application.
NOTE: Remember to use genuine themes and plugins.
Should you face any challenges, reach out to us, by posting a comment, or contacting us for assistance.
Web Hosting and email hosting Packages
Related content
- A Practical Tutorial for Dockerizing Software Applications
- How to Configure a Docker App to a Domain Name
- Getting Started with Docker | Docker commands
- How To Run Scripts in Linux
- Deploy a Django Application on EC2 Instance with Nginx
- How to configure a domain to a docker container and install an SSL certificate on AWS


